BPM Reprotran - original instructions
The Repotran is a Copy Attachment for BPM Universal Bellows. These are the original instructions that were provided with the Repotran.
Directions for use
Take the focussing screw portion and screw it in to the hole at the bottom of the sliding diffusing screen, making sure that it has been inserted from the side opposite to the two transparency spring clips.
With the bottom sliding clamp in a position that will not foul the bellows unit pillars, place the two vees of the assembled attachment on to the bellows, at the same time clipping the anchor block on the bellows end plate. By twisting the bottom sliding clamp across the pillars the unit is then ready for use. If any excessive friction is felt when focussing with the end knob a smear of vaseline or grease will ease it.
The transparency to be copied is held flat on to the diffusing screen by the two spring clips, these will allow the slide or film to be placed in most positions for reproduction.
If it is required to copy from a portion of 2 inch square transparency place the two spring clips in the lower holes in the diffusing screen.
When copying from single slides it is important that the slide is NOT bound between glass or the definition will be effected. Also do not slide metal or plastic mounted slides across the diffusing screen as this may scratch the surface of the plastic from which it is made. Accidental scratches may be removed by repolishing with Perspex polish, window polish, or metal polish. DO NOT use any abrasives. If necessary more than one screen can be purchased and used if one is required to be kept permanently masked for 1:1 reproduction.
Equal size reproduction
Basically, the condition for equal size reproduction is that the camera extension (the distance between the lens and the film plane) and the lens to the slide distance shall both be equal to twice the focal length of the lens in use.
In practice it is easier to place the transparency to be copied at the far end of the bellows pillars, setting it so that the outer edge (or cardboard mount), is showing equally all round in the viewfinder when the lens is focussed. Now slowly bring the transparency closer by turning the end knob and refocus the lens. Continue until the outer edge or mask is not visible in the viewfinder.
Here the user must be guided by experience, because the exactness with which the limits fo the image in the viewfinder screen correspond with the limits of the image recorded on the film varies from camera to camera. With a few SLR cameras the viewfinder image matches up closely with the image in the film. But with many cameras the film actually records more than can be seen in the viewfinder. This can be specifically tested for in the following manner. The camera (not loaded with film), is mounted on a firm support, check that the transparency mask is not showing in the viewfinder. Open the back of the camera, place a small piece of ground glass across the film aperture, with the shutter open on the "B" setting and the lens wide open, often it will be found that the chosen checking point falls well within the image seen in the viewfinder. Once the correct setting of the lens and diffusing screen have been determined they should be recorded for future use, so that the two can immediately be reset to their correct positions for future 1:1 reproduction.
It will quickly become evident in practice that any discrepancy between the camera and viewfinder is constant, in proportion to the area being photographed, and should be allowed for when making enlargements from a portion of a transparency close to one edge.
Illuminating the slide
In copying a colour transparency it is possible to illuminate the slide from the rear by daylight or electronic flash if using daylight film, or photoflood light if using artificial light type film. It is very important to see that no light spills directly into the lens or the final results will become degraded. This can be completely overcome by the use of our supplementary hood which fits between teh diffusing screen and the lens. If this is used it should be fitted after final framing and focussing.
The frame of this hood fits over the screen, while the end of the round mount fits over either a BPM reverse mount or if the lens is being used in the reverse position, over the mount which is usually used to hold the lens into the BPM Bellows Unit in the normal manner. If slight changes of colour balance are required of the copy, the colour of the light may be altered by using gelatine placed at the back of the diffusing screen. The Kodak CC series of filters are most suitable for this purpose.
Finding the exposure
When using a floodlight from the rear any through the lens metering camera will give the correct reading in the normal manner. Correct exposure can also be ascertained by placing an exposure meter close up to the slide and making a direct reading through the transparency. When taking an exposure this way it must be remembered that to reproduce a 35mm slide the same size a total extension of twice the focal length of the lens wil be required. This means that the meter reading must be multiplied by four. For example, a meter reading of � sec. at F11, the correct exposure would be 1 sec. at F11 or � sec. at F5.6. Electronic flash is probably the easiest method of lighting due to its constant colour and light output. it is possible to place the flash unit in direct line of the camera axis behind the diffusing screen. However, due to the short duration of flash the only possible way to obtain the correct exposure is by practical test. Start by placing it 1 ft. away and make tests on an average correctly exposed transparency, and keep a record of all exposures taken for future reference.
For example with an amateur electronic flash unit used with a guide number of 28 for Kodachrome II, directly behind the diffusing screen, the exposure would be F9 for an average density transparency.
Choice and use of lenses
The length of the pillars of the BPM Bellows Unit are ample for equal size reproduction to be obtained with the standard lens on most 35mm cameras. However, with a camera that accepts standard Pentax type screw lenses it is possible to include most of the width of a 2 inch square transparency or as little as just over half the width of a 35mm slide.
Additional magnification can be made by the use of supplementary lenses or lens extension tubes on the front of the cameras. It will often be found that shorter than normal lenses make very good copies due to the fact that the transparency to lens distance becomes shorter and so is very useful for making enlargements from a portion of the slide.
For reproductions at ratios of 1:1 or larger, wide angle and normal focal length lenses often give better definition when used in the reverse position. This can be achieved with the use of a BPM reversing mount, which screws into the lens filter position, allowing the lens to be inserted into the front of the bellows unit reversed.
The type of lenses that must not be used reversed in this way are lenses marked "Macro" or enlarging lenses, both of which are designed to give maximum definition in the normal forward position.
Lenses which are more or less equivalent in performance with subjects at normal distances may show considerable difference when used extended as an equal size reproduction. Hence if more than one lens is available of suitable focal length it is worthwhile to make comparative tests, so as to select the one which offers the most satisfactory results. These tests should include exposures taken at several apertures to prove the lens for definition as many lenses give sharpest results at apertures two or three stops smaller than their maximum aperture. If the tests are intended for use with colour film they should all be taken from the same transparency, making sure to choose a slide which is perfectly sharp and contains within it most of the primary colours. The results will prove the difference in colour balance from different makes of lenses and can be used to advantage, particularly if records are kept of all exposures. The systematic recording of exposures, lenses and film used in copying work should be made in invariable routine for assessing future exposures if serious copying is contemplated.
Colour Duplicates on reversal film
Since commercial processes for the duplicating of colour slides employ special techniques and specially designed duplicating colour films which are supplied only to commercial or professional users the amateur must be cautioned not to expect too high a degree of fidelity in colour duplicating. However, colour copies of very acceptable quality can be produced from suitable slides, and in fact it is possible to correct colour casts in faulty originals as well as trimming out unwanted portions of a slide. Duplicating slides on to the same colour film stock as had been used in the original will nearly always result in an increase in contrast. Therefore slides which lend themselves well to duplicating are those which are free from excessive lighting contrast, but are slightly under exposed with strong colour. Over exposed slides with weak colours will give poor results.
To overcome the problem of increase of contrast in the final copy much can be achieved by careful selection of the copying type of film. For example, a slightly contrasty original taken on the film such as Kodachrome II will duplicate more satisfactory on to a soft, less contrasty film such as High Speed Ektachrome or Agfacolour.
Conversely, a slide that has been taken under dull or misty lighting conditions, and is lacking in contrast, yet has a full range of colour. Added sparkle can be gained by making a copy using a contrasty film.
Colour negatives from colour slides can be made by using colour negative film in the camera, again the choice of the original is very important. The best results come from correctly exposed and colour balanced slides with low contrast. Daylight, or electronic speed flash is probably the most suitable lighting for this purpose.
A few "DO's" and "DON'T's" for successful duplicating.
- DO clean the original before making a copy. Any dust or dirt will reproduce and spoil the result.
- DO make sure the light does not shine into the lens.
- DO keep records, such as exposure, lighting, lens and film used. This saves time and film when doing subsequent work.
- DO NOT scratch the diffusing screen by sliding metal or plastic slides across it. If your screen becomes accidentally scratched beyond repair a replacement can be purchased for a small sum.
- DO NOT attempt to copy a slide that is still bound between glass.
Macro Photography Techniques
You will find everything you need to know about macro photography in our easy to follow technique guides to help you take great close ups.
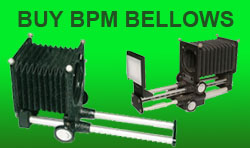
BPM Bellows
We have limited stocks of used BPM camera bellows including customised sets for the Bowens Illumitran professional slide copier.
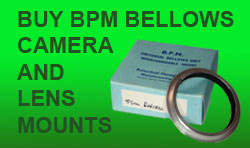
BPM Camera and Lens Mounts
We have the worlds largest collection of original camera and lens mounts for the BPM bellows.

BPM Bellows Spares
We can supply spare parts for BPM Bellows. Every item in stock from the bellow material to tiny screws that hold them together.

BPM Bellows Accessories
Accessories for the BPM Bellows to expand their versatility, including the Repotran slide copying add-ons.